How to Convert MS Access to MySQL Database.
In this guide, we’ll explore how to use Data Loader to Convert MS Access database to MySQL and how to save and schedule the session for future use.
To begin, navigate to the Data Loader option in the menu and click on it. You will be greeted with the welcome screen, followed by the opening of the Data Loader Navigator form, as illustrated below.
Convert MS Access to MySQL
1. Select the Start a New Session Option and click Next Button.

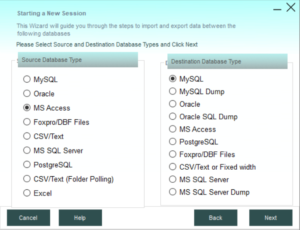
2. Select the source and target database types and click Next to proceed. For example, in this guide, we’ll Convert MS Access to MySQL database tables. Choose MS Access in the Source pane and MySQL in the Target pane, then click Next to continue.
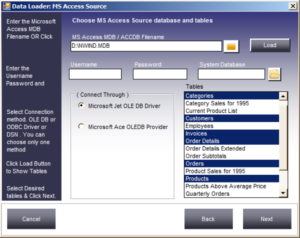
3. Now you will get a window to select the Source MS Access Database. Click the browse button to select the access mdb file or type in the path and name of the mdb file and click the load button. Then you will see list of tables residing in that database. Select the desired table which you want to convert to MySQL and click next. For example lets convert Categories, Customers, Invoices, Order Details, Orders and Shippers table. Select these tables from the list by clicking mouse button and then Click Next
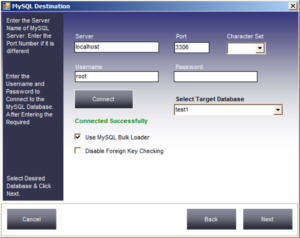
4. You will now see a window to configure the target MySQL database. Enter the server name, port number, username, and password, then click the Connect button to retrieve a list of MySQL databases available on that server. Select the database where you want to load the data, and click Next to proceed.
5. After selecting the Source and Target Databases, a window will appear displaying the Source and Target tables, as shown below. You can modify the destination table name or choose an existing table from the drop-down list. To filter columns, define column mappings, specify a WHERE condition, or configure loading options (for scenarios where the target table already exists), click the Columns button, as illustrated in the figure below. Select the database where you want to load the data, and click Next to proceed.
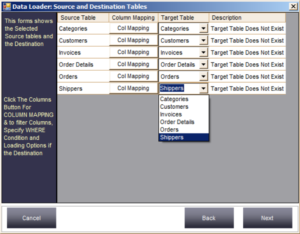
6. Let us click the Columns button for Orders table. After clicking the button you will get a Window as shown below

7. Now I want to load only those orders whose Order Date is greater or equal to 01-14-2014. And I don't want to load EmployeeID column. To do this click on the Source Column Drop down List box and Select Skip and specify the where condition in the Where Condition Text box.

And If the table already exists in subsequent session runs, I want to just append rows in the existing tables. To do this click the Append Rows option as shown in the above picture. When you click close button the Data Loader automatically checks any data type mismatch and where condition.
8. Once you have configured the loading options and applied any column filters, the next window will appear, as shown below. Here, choose whether you want to save and schedule the session for future use or run it immediately without saving. Enter a session name (or use the default) and specify a log file name to record the session summary. Set the schedule frequency if you plan to run the session at regular intervals. If you choose to run the conversion immediately, Data Loader will save the session to the repository and display the loading form to begin the process.
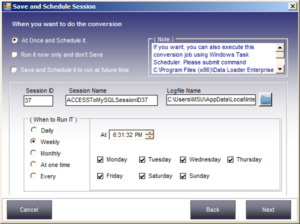
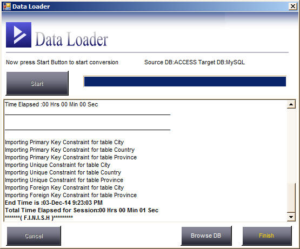
Now you are ready to Convert MS Access to MySQL. Click the Start button to start the conversion.
